 |
| Let's make you less terrible. |
 |
| Disgusting. |
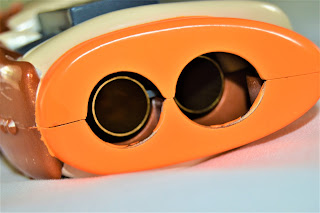
Go ahead and gut the thing because the only part we care about here is the barrel assembly on the top left. Be careful handling this thing, especially when you start running the power tools on it as it's quite fragile.
Take a good sized drill bit and bore out the dart posts from the back, this will weaken them enough that you can just rip them out. This will also increase the airflow into the barrels a bit more. Make sure you sand down any excess plastic so the brass can sit flat against the surface.
Next, grind down the ridges that the dart posts sat on so that way the brass can sit perfectly in each channel.
Take two 4 inch segments of your 17/32 brass tube and test fit them in the channels. If they sit flush, remove the brass then run a ring of hotglue around the remnants of the orange dart post to help airtight the barrels. Then run some superglue along the channel before dropping your brass back into place to let dry. I also ran a bit of glue along the bottom outside edge of the brass to help with sealing. Make sure you trim any excess glue away so it won't interfere with the travel of the plunger tube.
Reassembly is a bit tricky, but also make sure you clear out any plastic debris from the earlier steps. Start by working the plunger and spring assembly in from the front and then position the catch before setting it all into place. Hold the whole thing down while you put the shell back on, and you're basically good to go. You could also upgrade the old gasket seals and perhaps the main spring but I decided I didn't want to put much more effort into this thing.
Now the Warthog can accept any type of regular dart and provided you either did a good job sealing the barrels or don't have bad gasket heads, this thing can vacuum load darts. Helpful considering Elites come to rest nearly a full inch deeper than they would have stock. The barrels are a bit tight so looser darts are slightly more ideal but as for performance figures, I'm pulling around 50 to 60 feet out of both barrels with much better accuracy. This is a vast improvement over the stock blaster although personally, I'm still not a huge fan of how small and loud operating this thing is. Nonetheless though, the Warthog is definitely a much more fun blaster now that's got proper barrels and it wouldn't make for a bad secondary.


It's a classic...Cool
ReplyDelete